Watching the market for the right exit can be one of the most tiring parts of active trading. Traders holding multiple option positions across expiries often split their attention between the market and the P&L tab, deciding whether to book profits or cut losses. CubePlus now offers a feature called Shield that automates this decision once the exit rules are set. Simply define a condition based on profit or loss, a fixed time, or a price move in any instrument, and Shield automatically exits the position when that condition is met.
Shield offers several capabilities, so this guide is divided into three parts. Part 1 explains how to access Shield from the CubePlus dashboard, select positions, and create a Profit & Loss–based exit rule. Part 2 covers Time-Based and Price-Based exit rules. Part 3 explains how to edit an existing Shield, use the management screen, and understand when each exit type is best suited.
Three ways to exit, one starting point
Traders can either Activate Shield , allowing CubePlus to automatically place the exit order when the condition is met, or use it as an Alert, where the platform only sends a notification and the final exit decision remains with the trader.
Getting to Shield
Shield is available inside the Positions tab, not as a separate menu. From the CubePlus dashboard, open Positions to view your open positions. Next to the search bar, you'll find the Shield button. Clicking it opens the Available Shield panel.
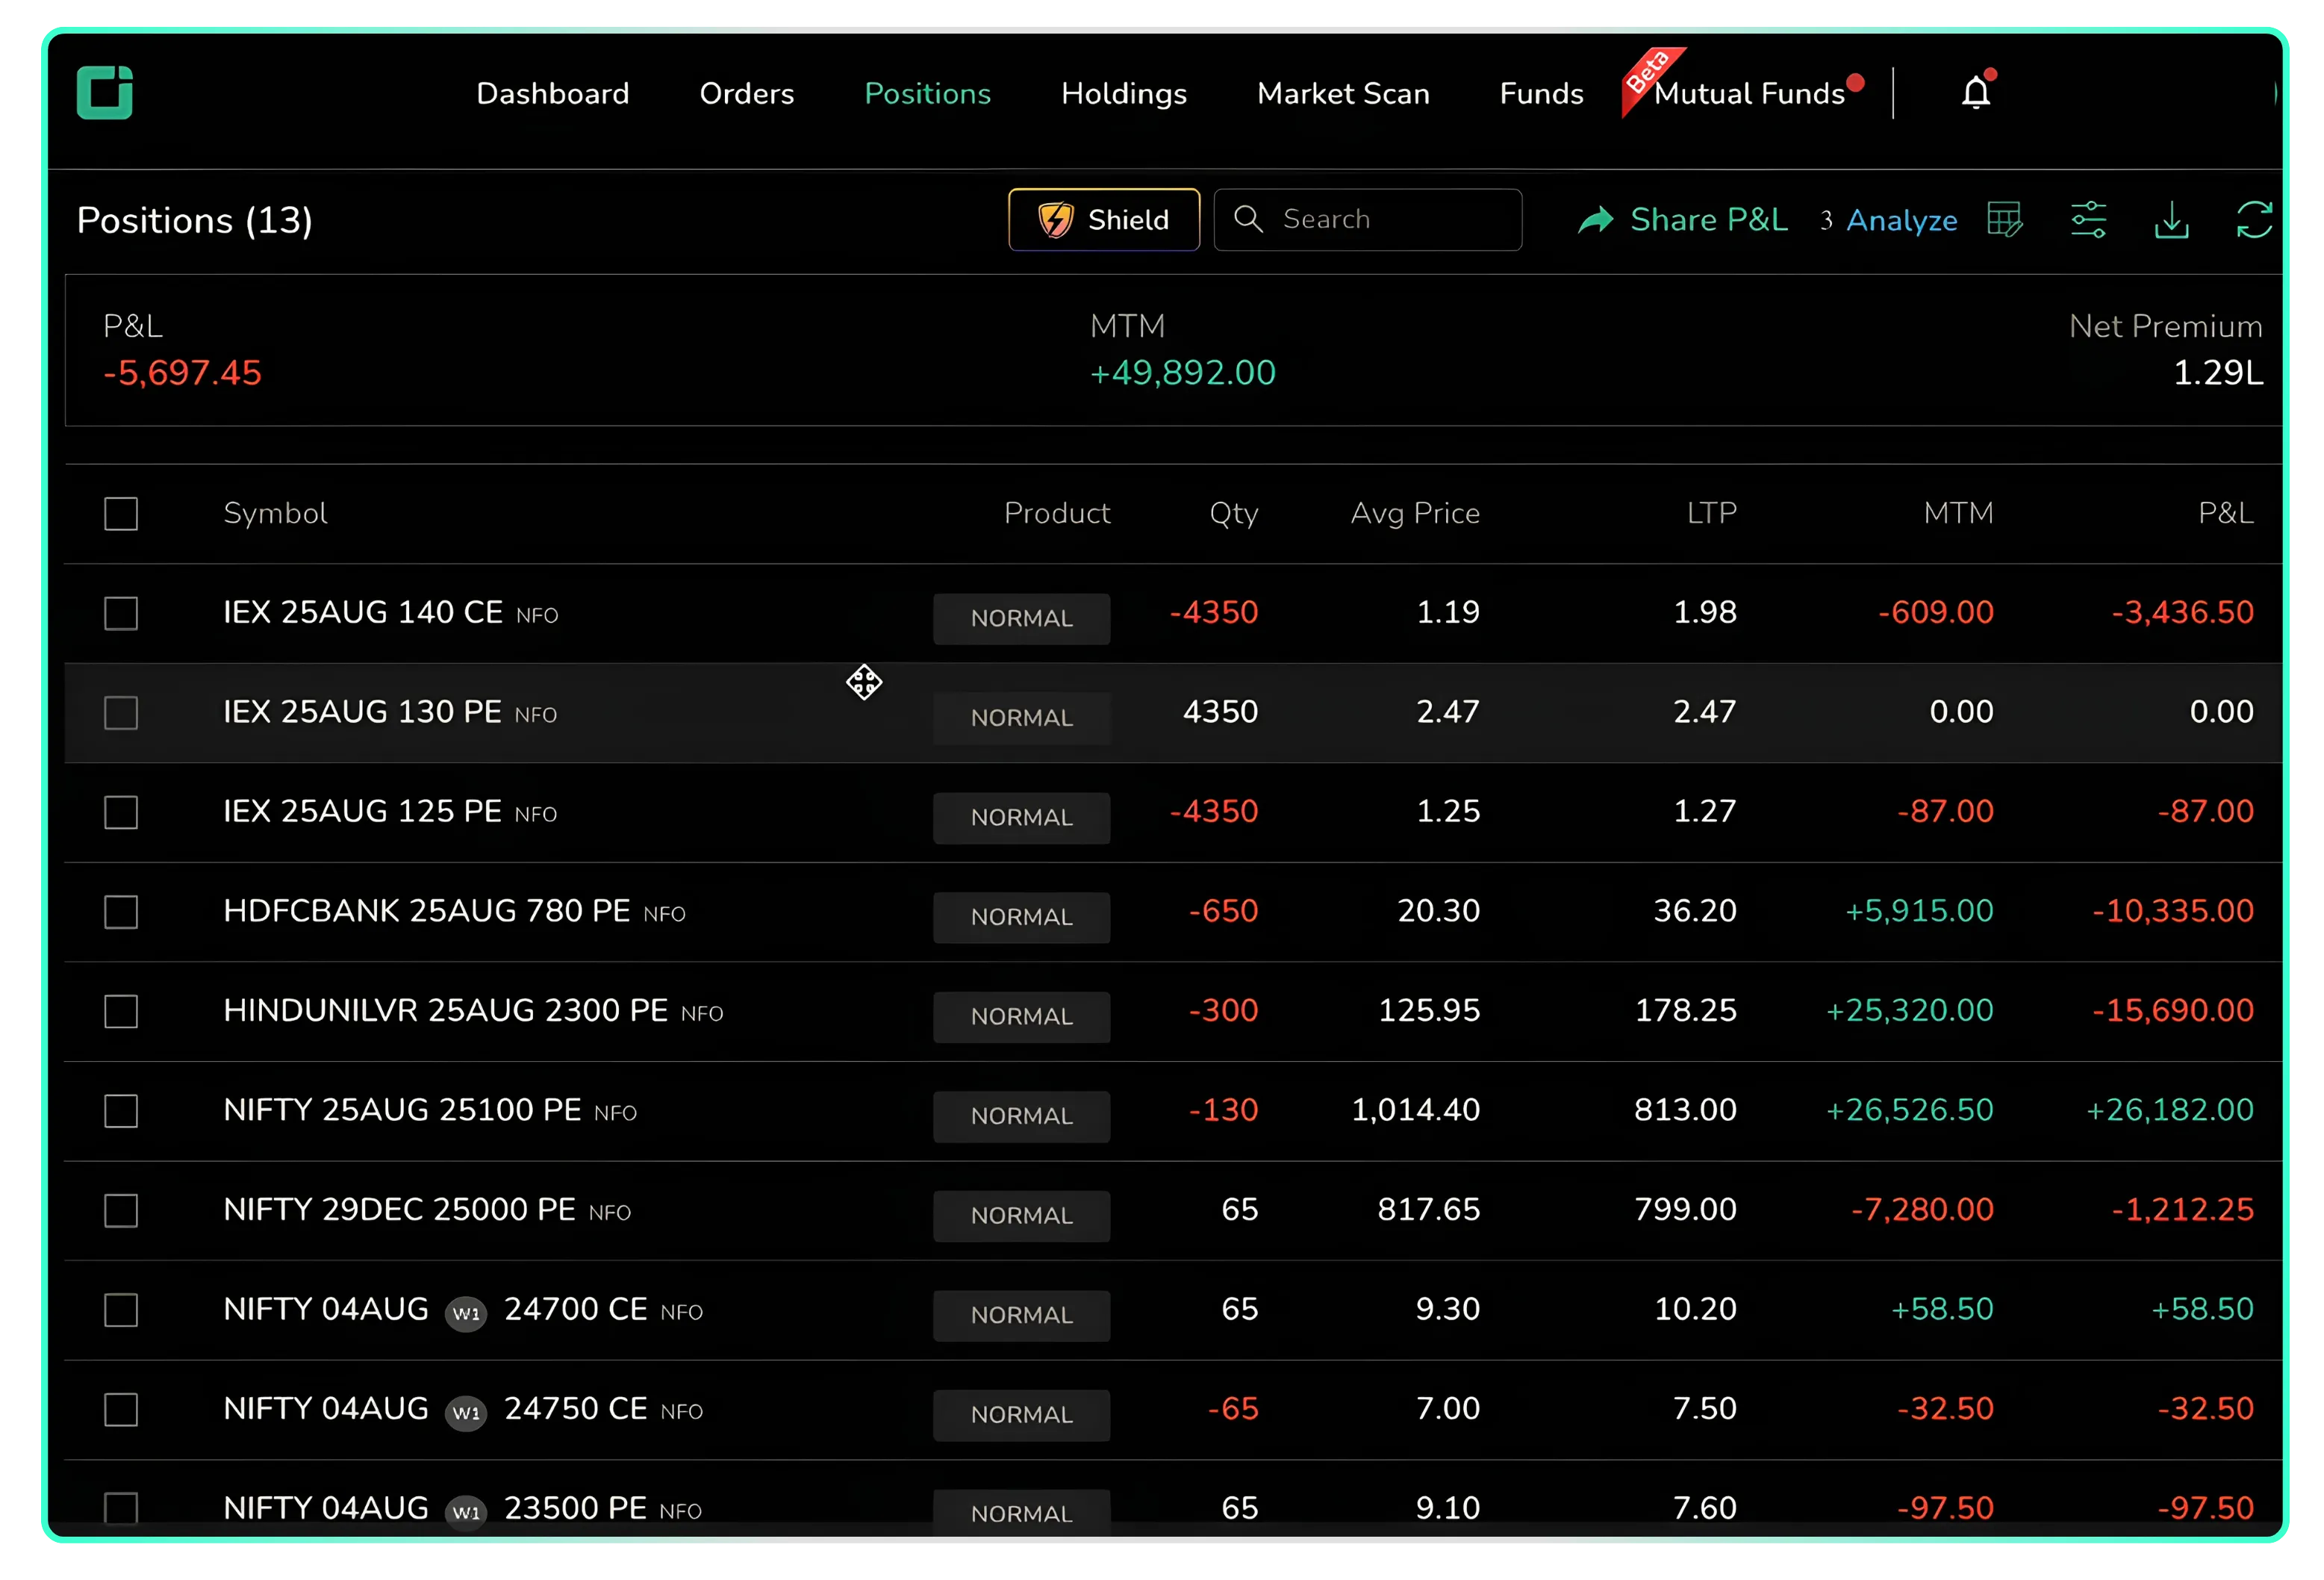
Inside Positions, the Shield button sits beside the search bar.
Choosing which positions to protect
When the Available Shield panel opens, all open positions are selected by default. If you're managing multiple positions, you can first clear the selection by unchecking the header checkbox. Then, use the Filter icon at the top-right of the panel to quickly find and select only the positions you want to protect with Shield
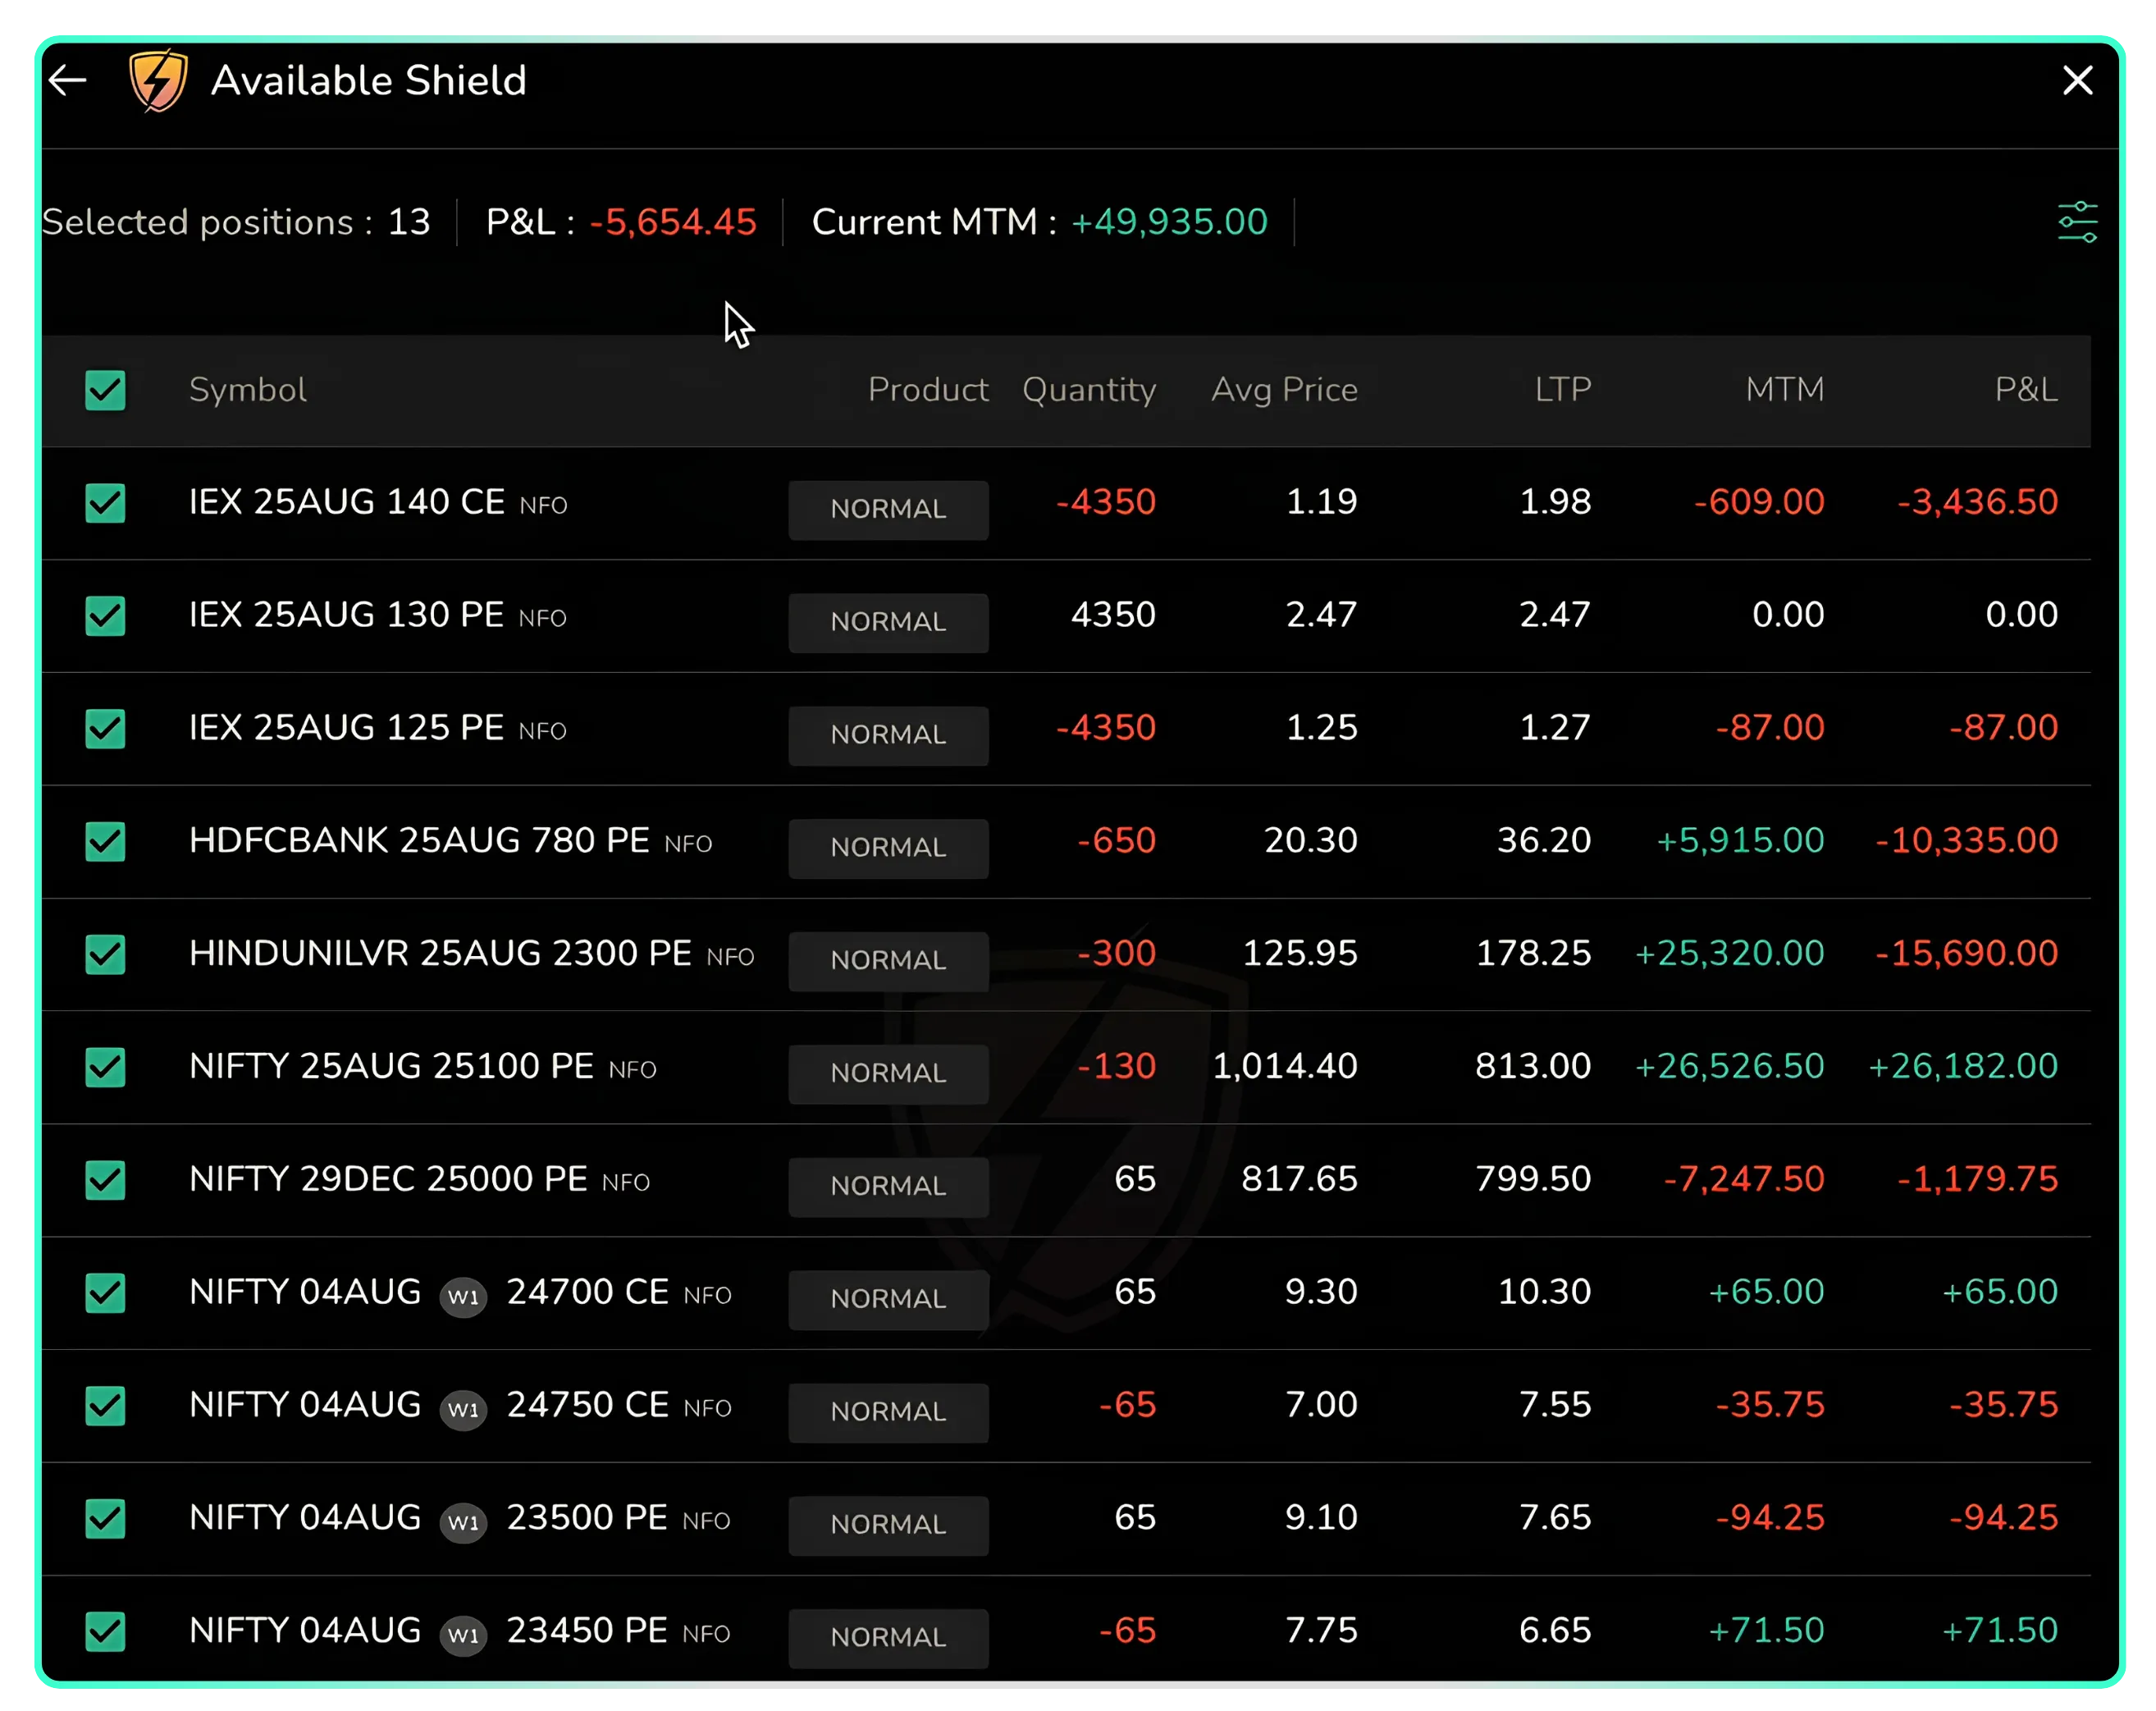
The Available Shield panel opens with every position selected by default.
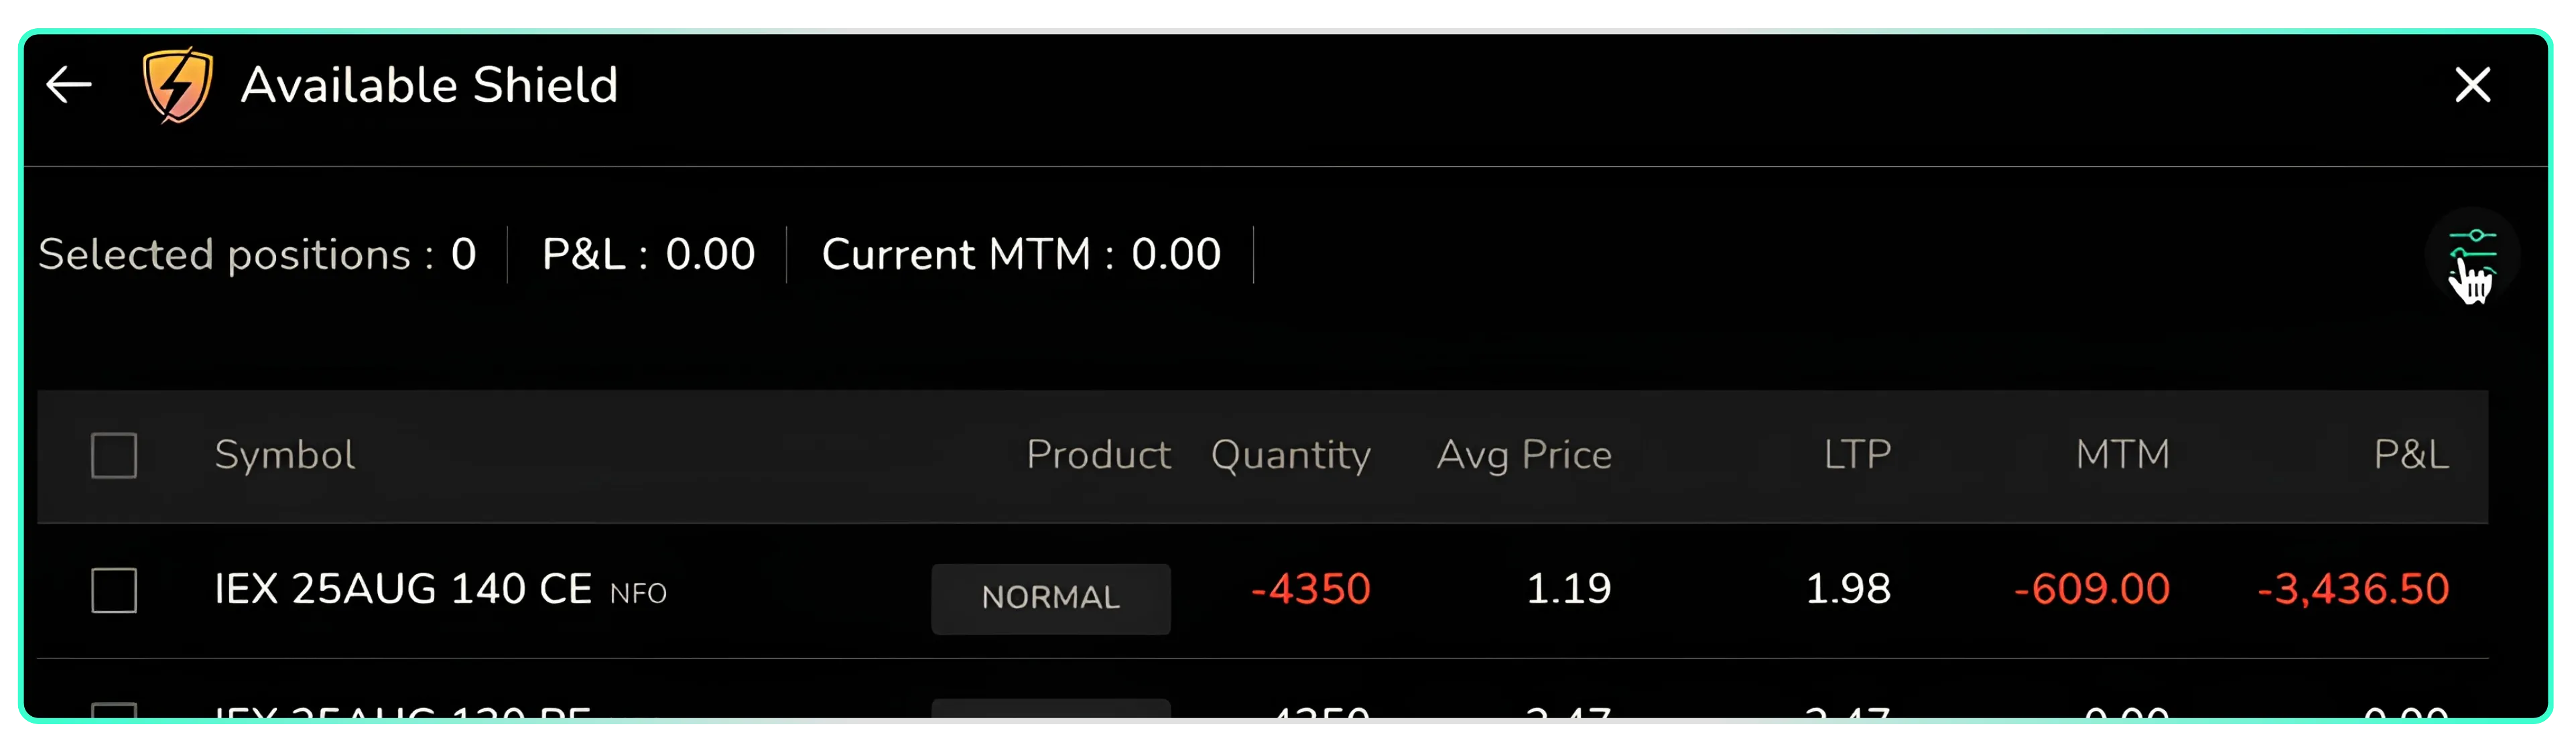
All positions unchecked, with the filter icon highlighted at top right.
The Filter panel lets you narrow positions by segment (NFO or MCX), product type, order status, Buy/Sell, instrument type (Futures, Calls, or Puts), underlying symbol, and expiry. For example, if you want to apply Shield only to Nifty options expiring in a particular week, you can filter by that expiry instead of scrolling through the entire positions list.
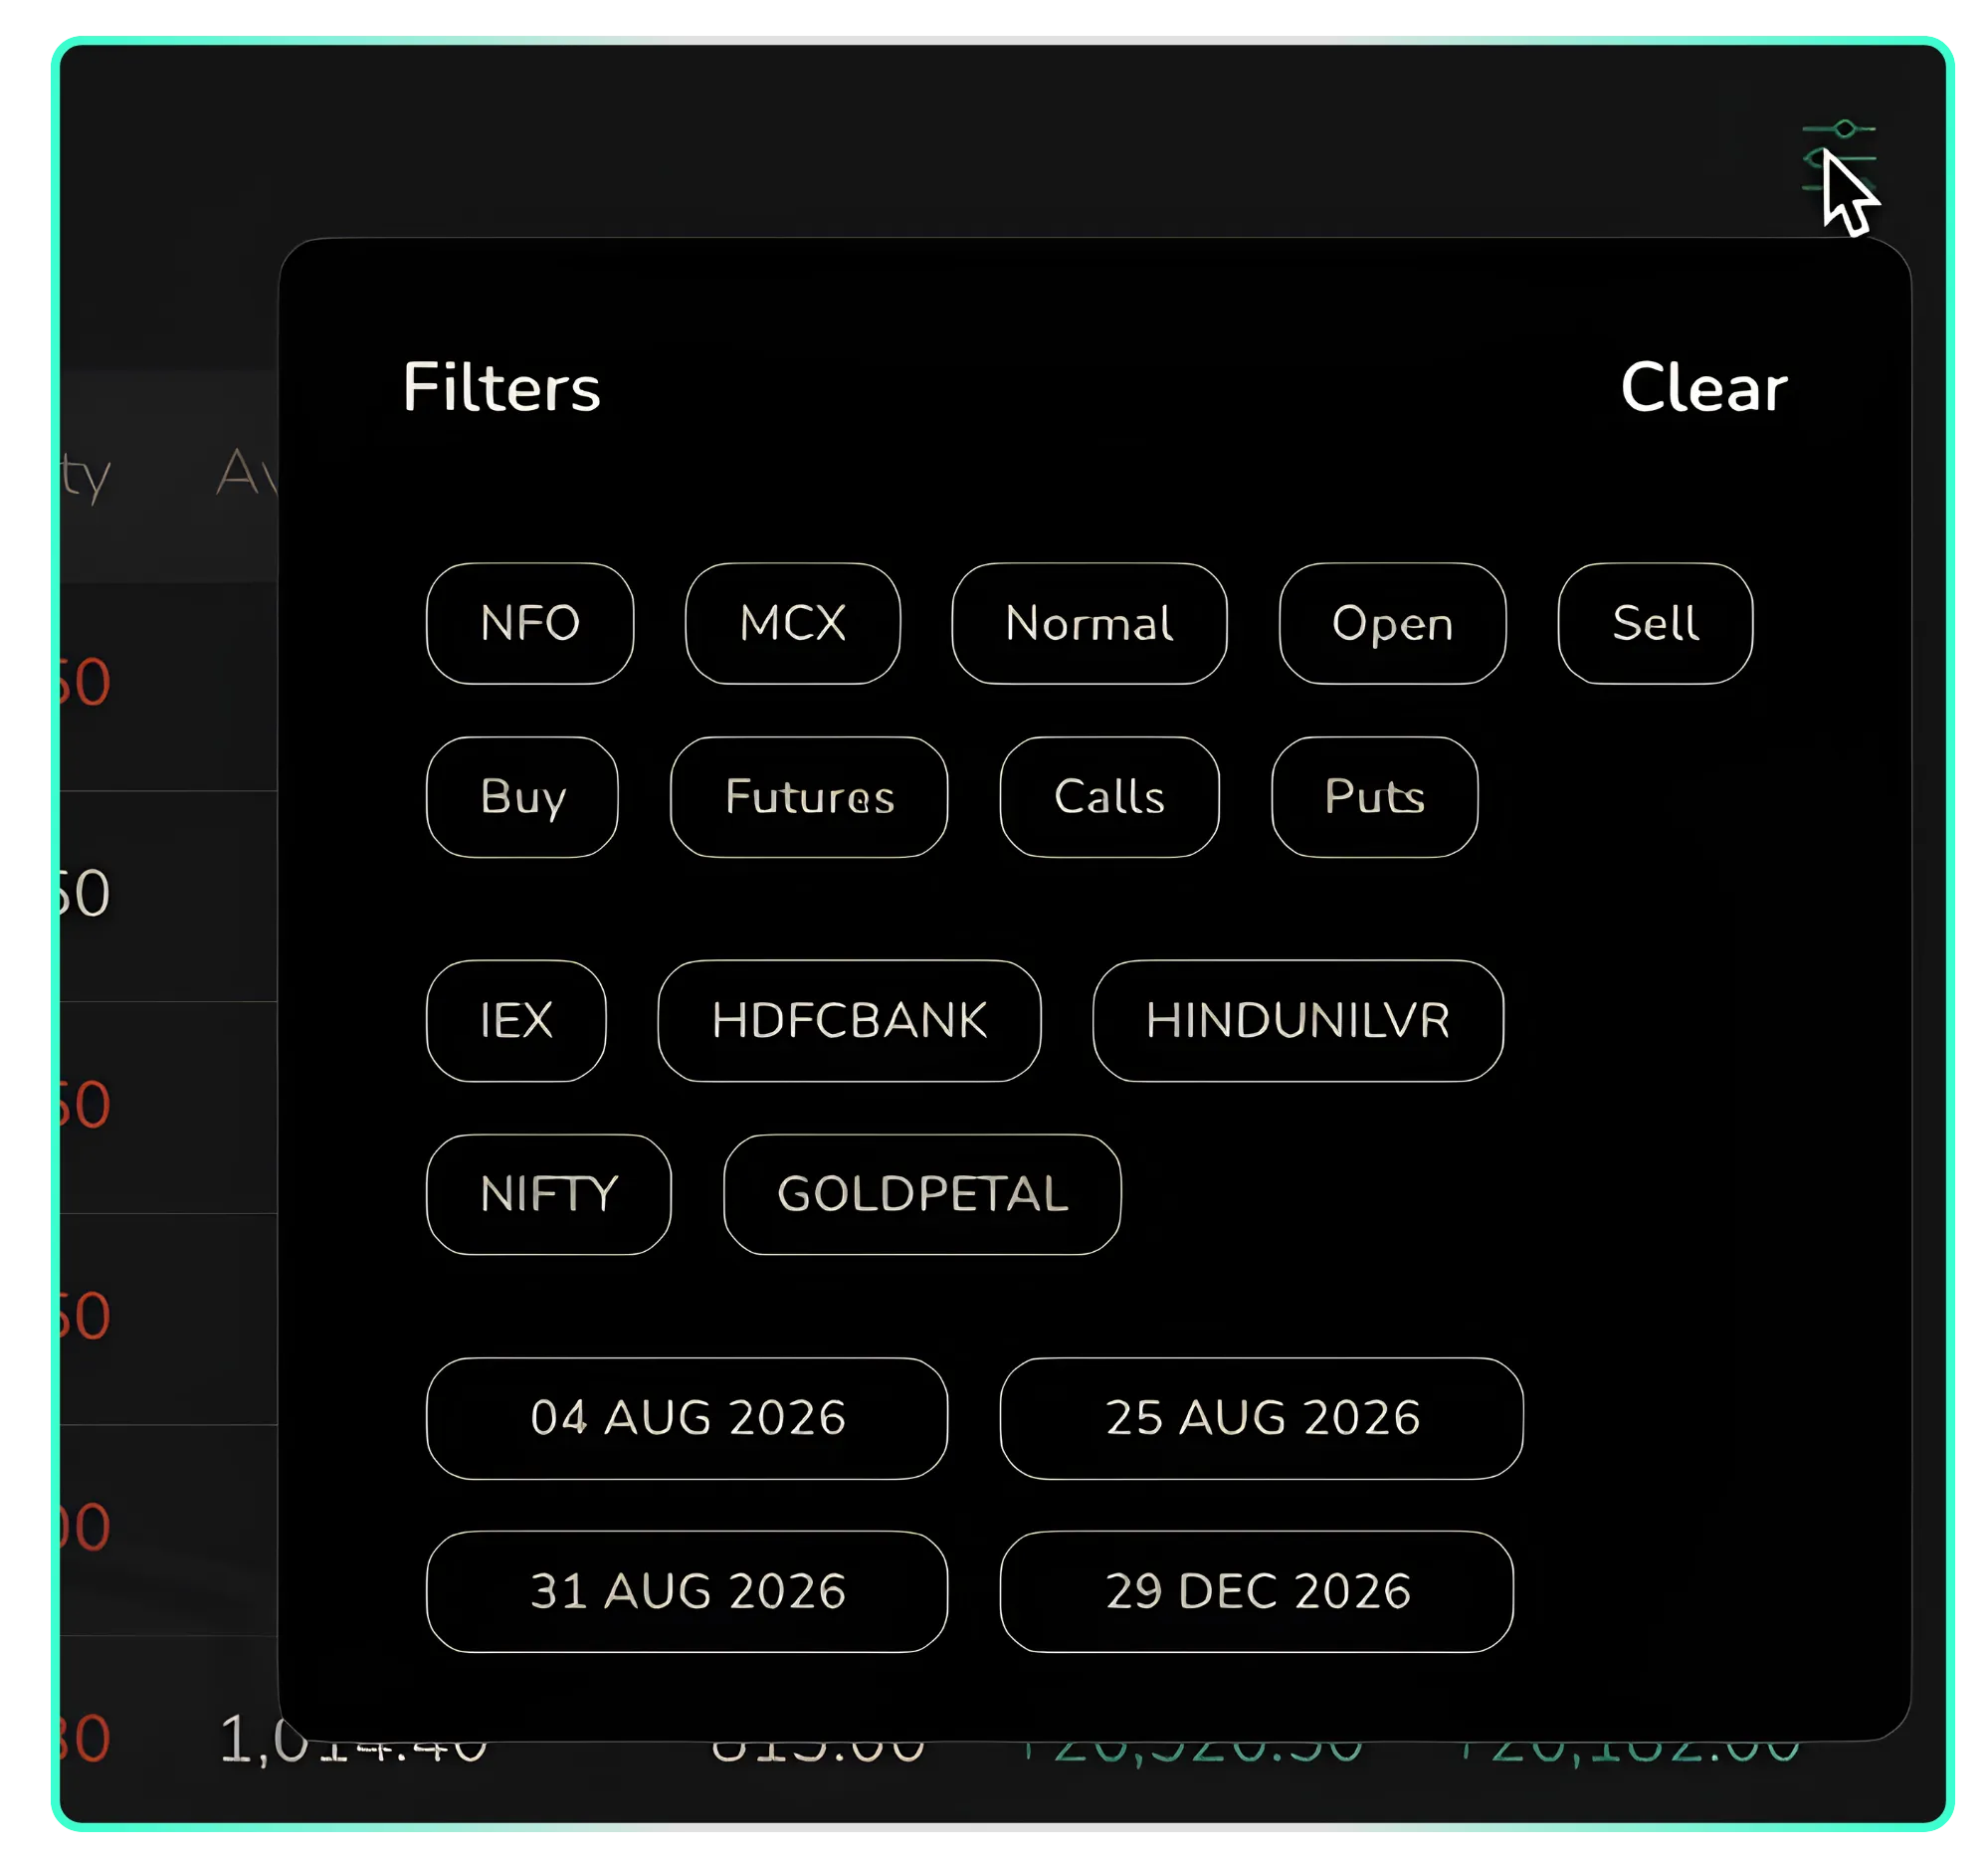
The filter panel, grouped by segment, product, side, instrument type, symbol and expiry.
Filtering by the 4 August 2026 expiry, for example, narrows the list to the five Nifty contracts under that expiry, out of the thirteen open positions in the account.
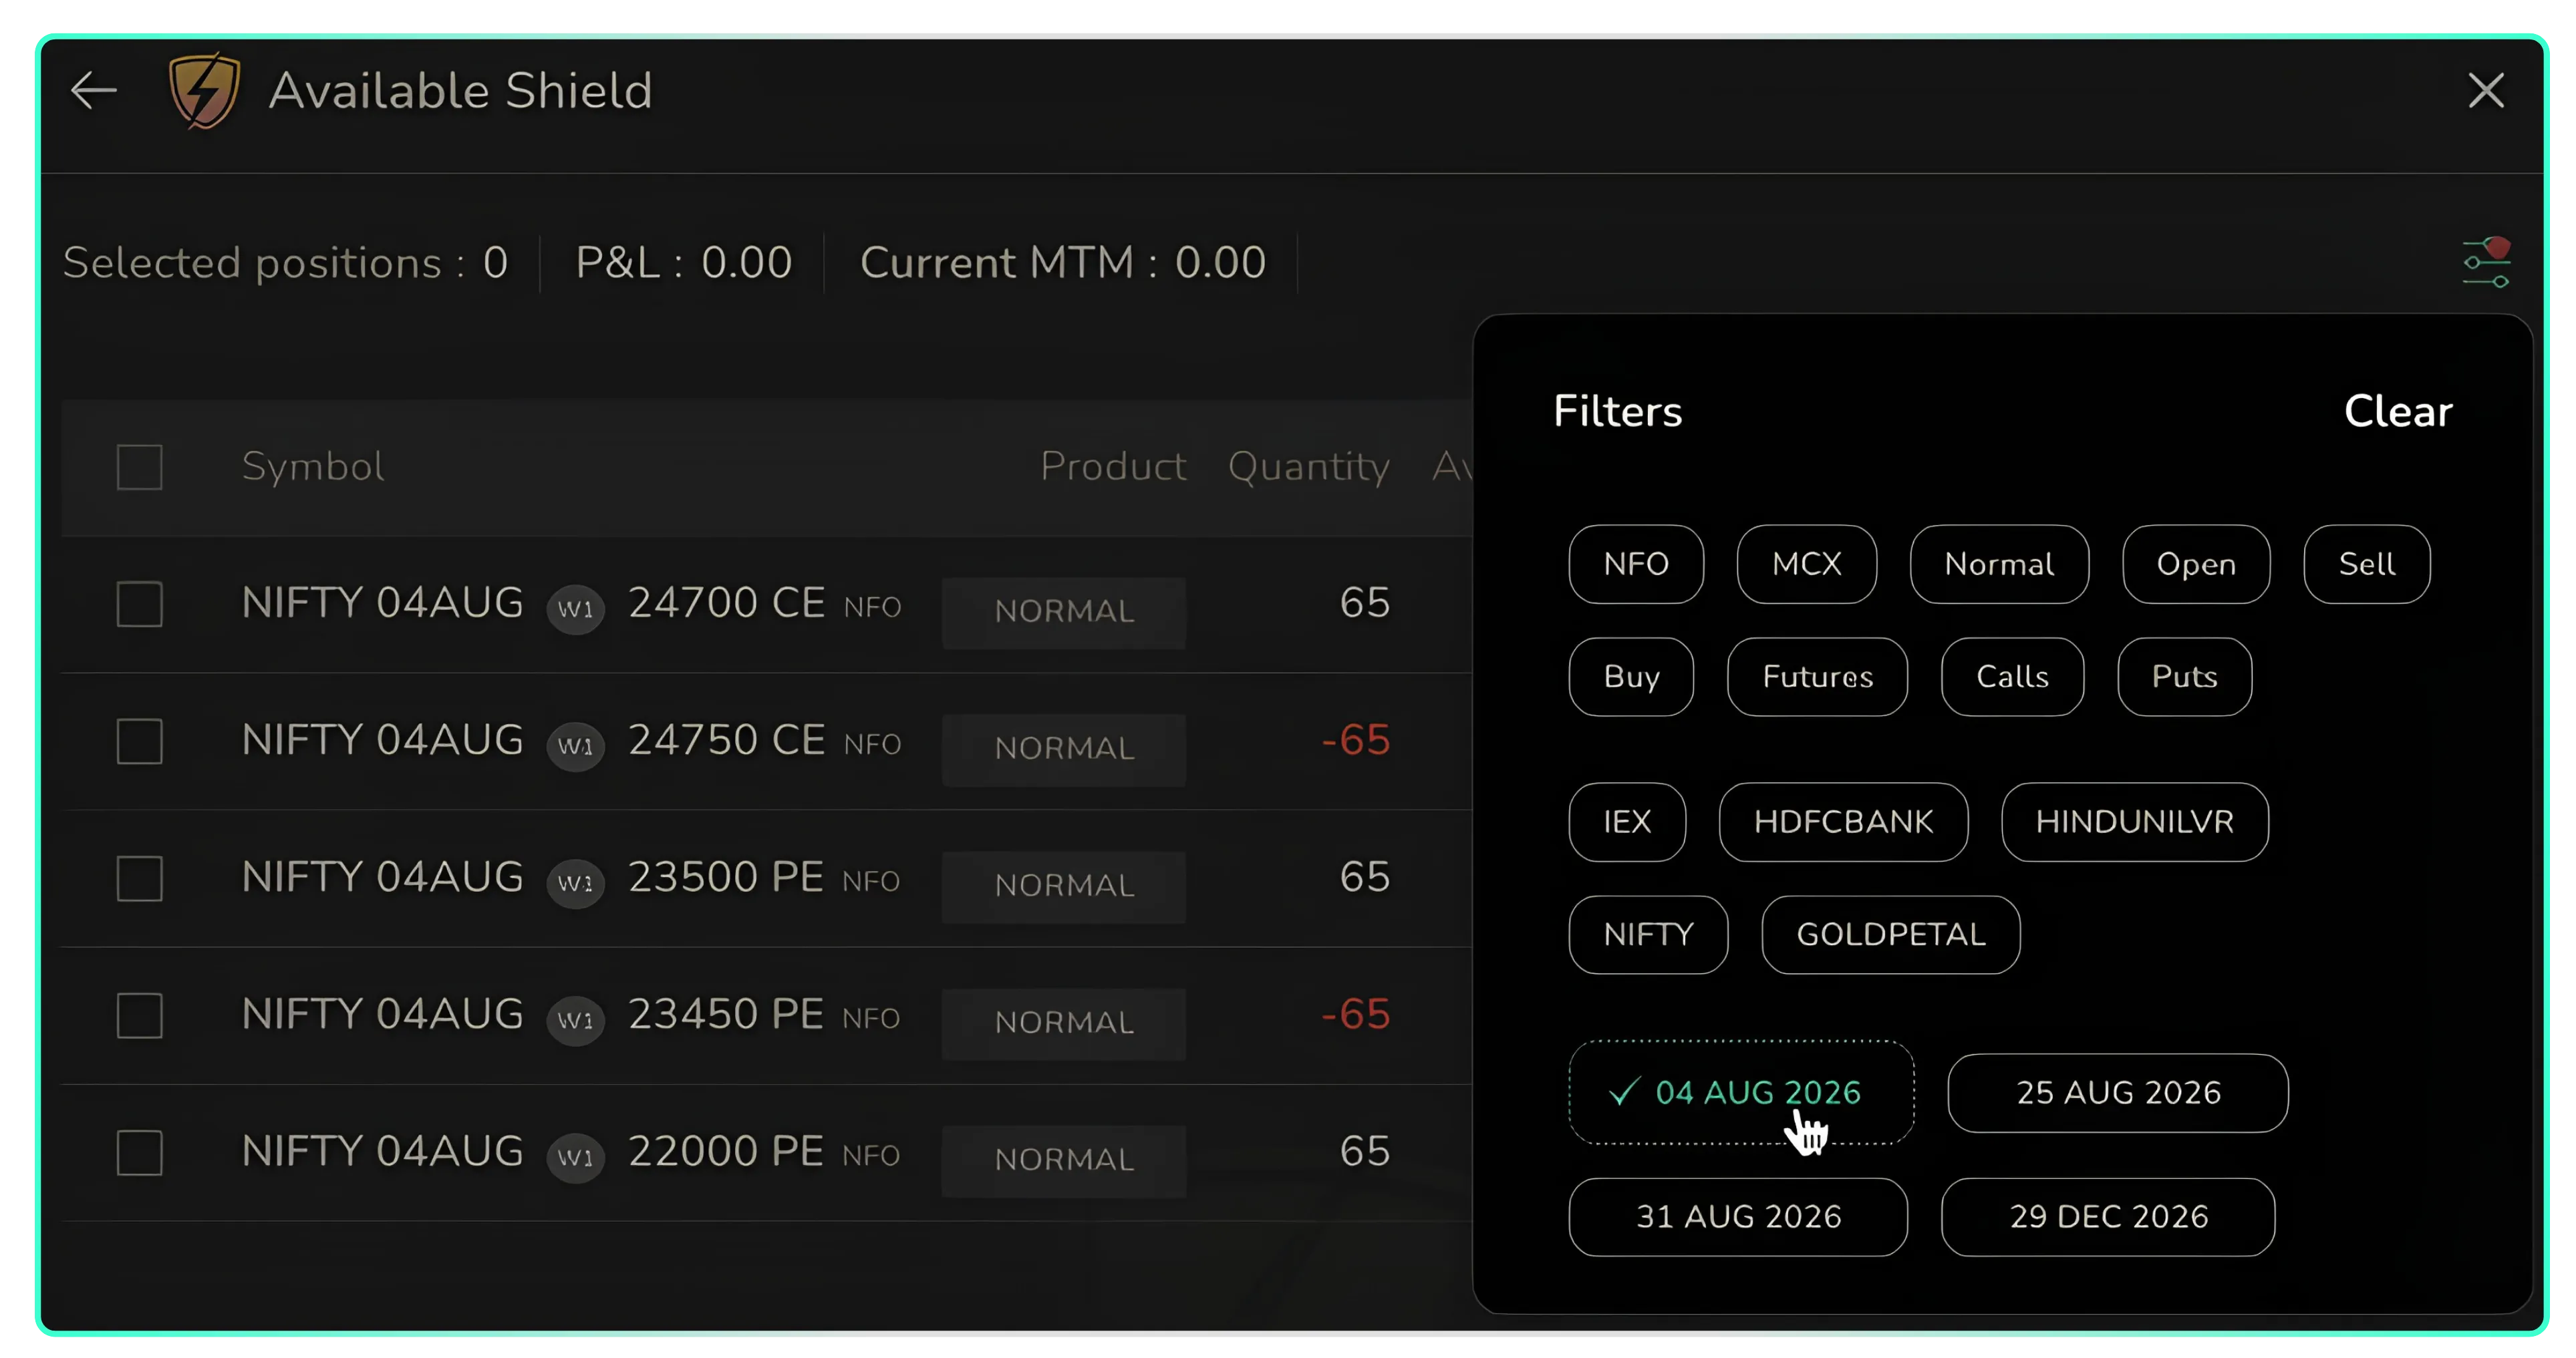
Filtered to the 4 August 2026 expiry, narrowing thirteen positions down to five.
After selecting the required positions, the panel displays the number of selected positions, along with their combined P&L and current MTM at the top. Click Continue to proceed to the next step.
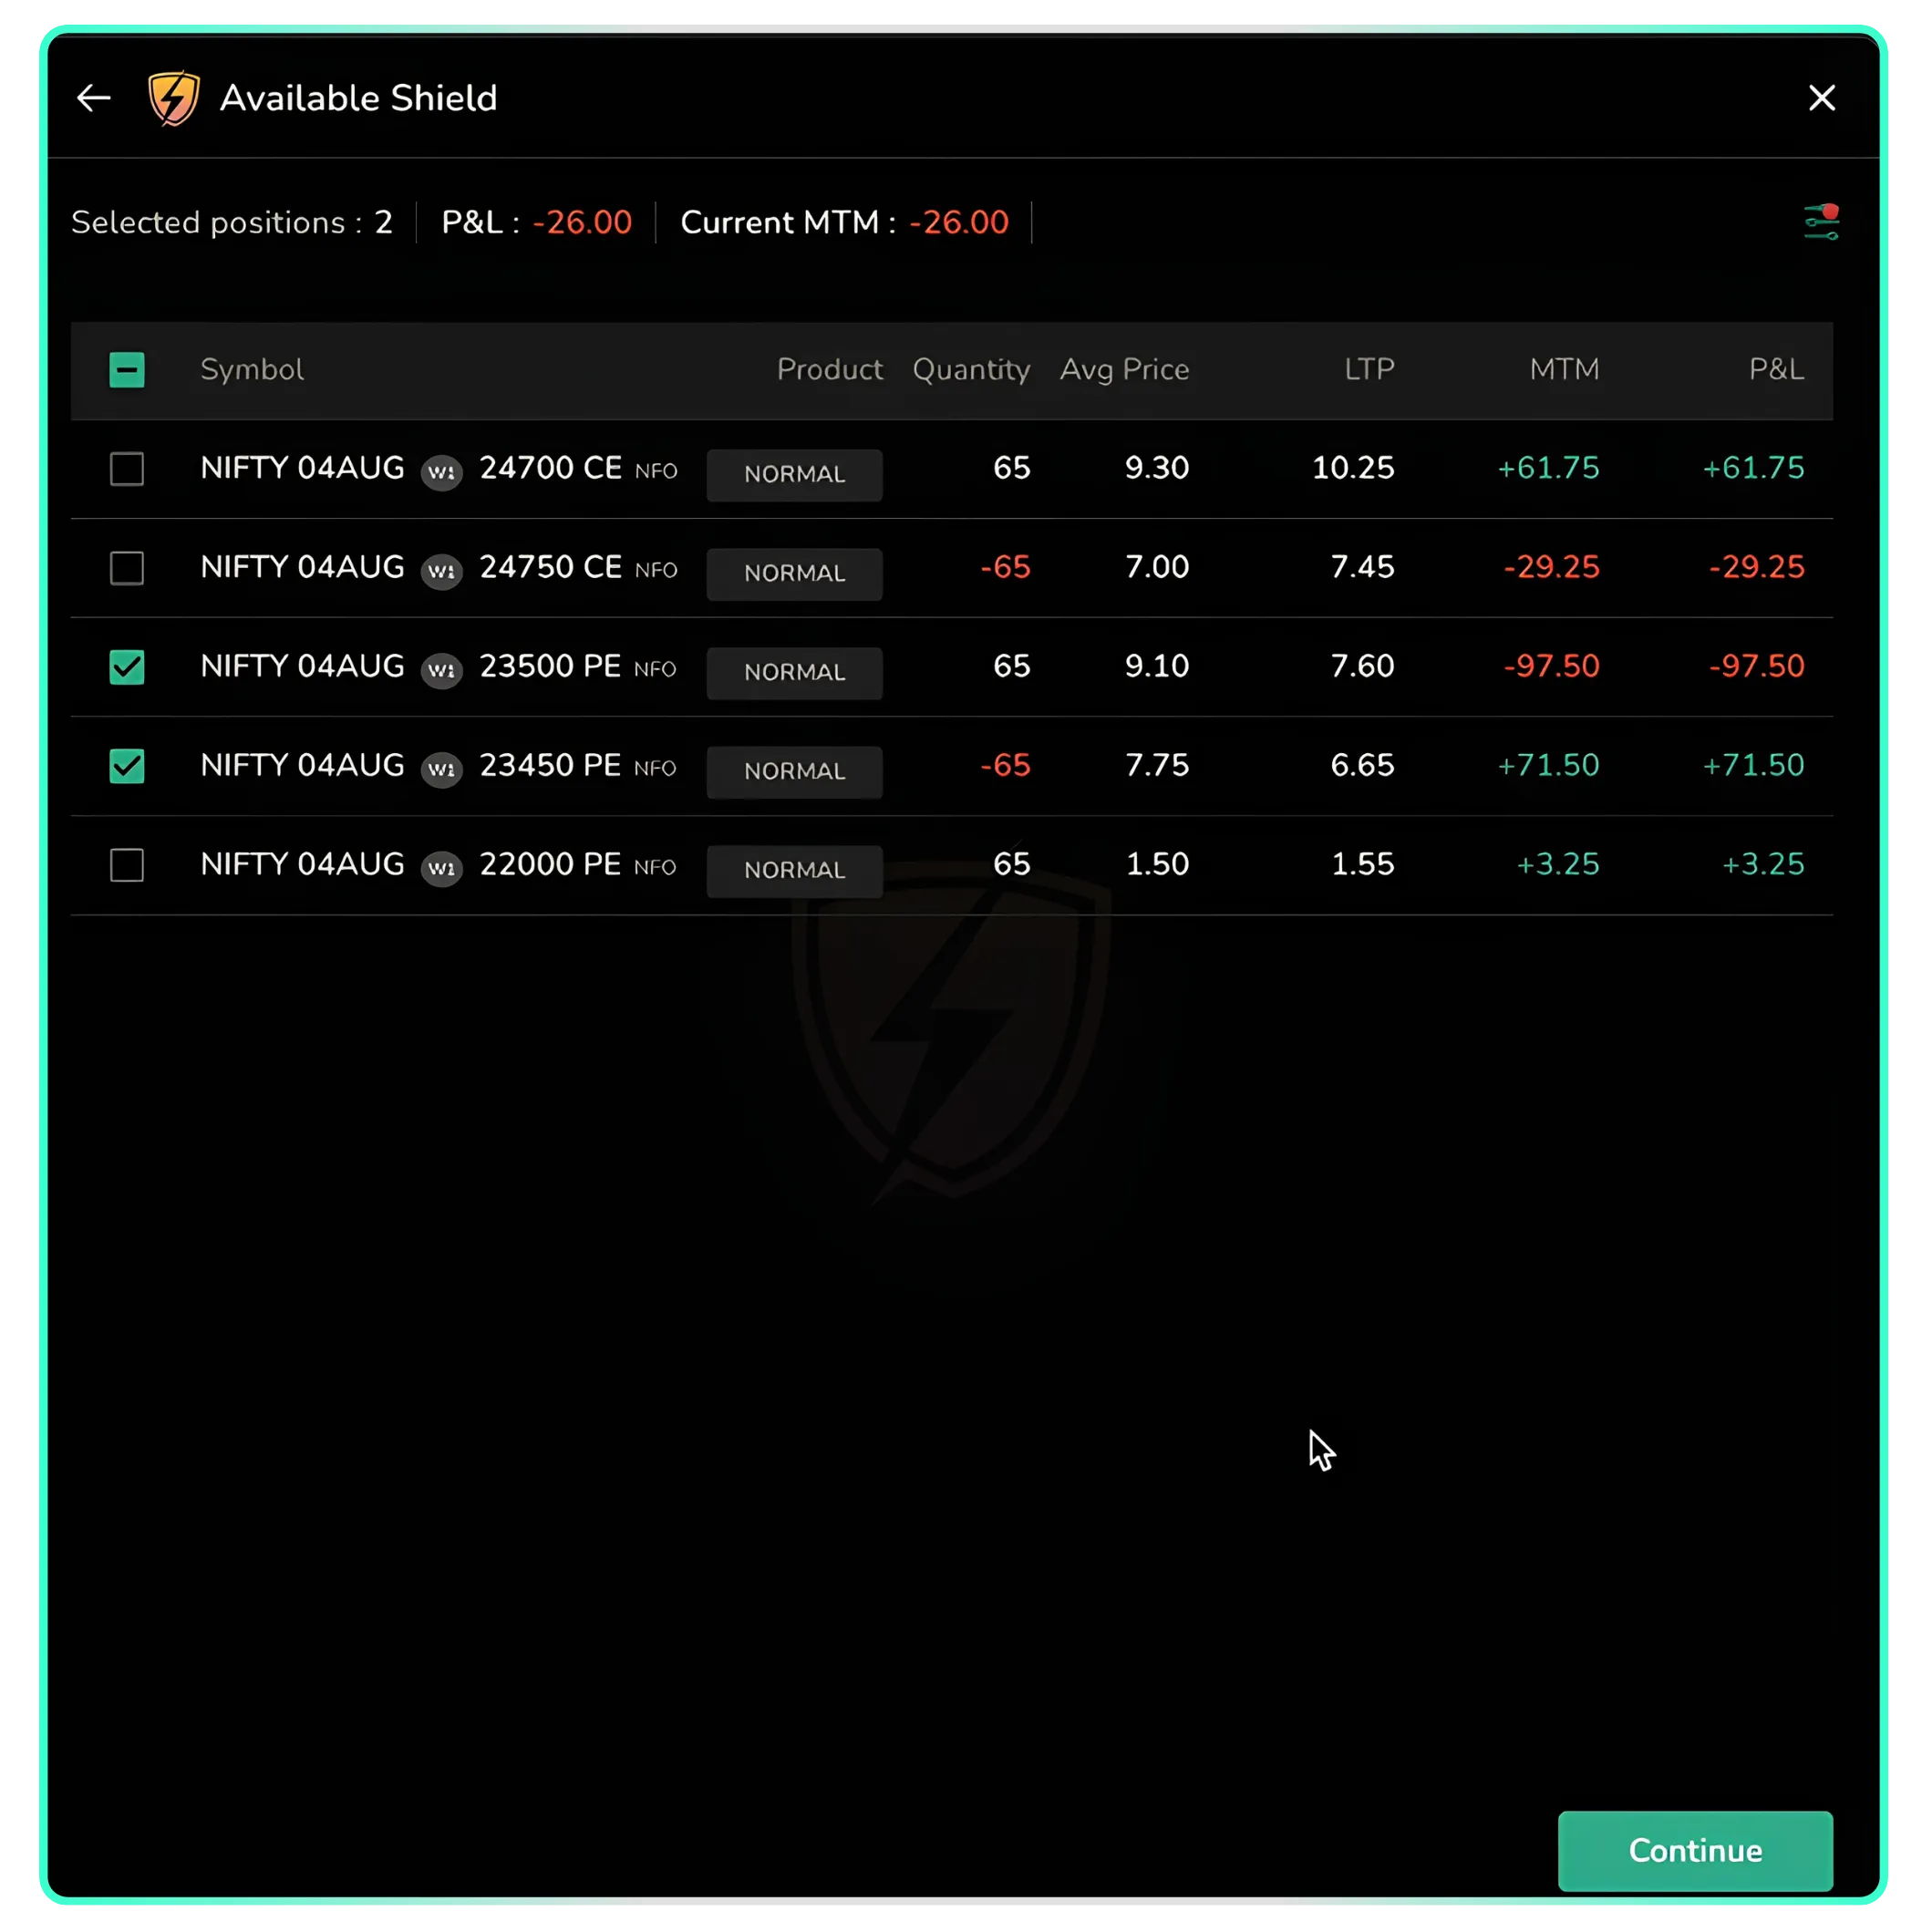
Two positions selected, ready to continue.
Setting a profit and loss exit
The next screen displays the three exit types as separate tabs: P&L, Time, and ATO. This part of the guide focuses only on the P&L tab.
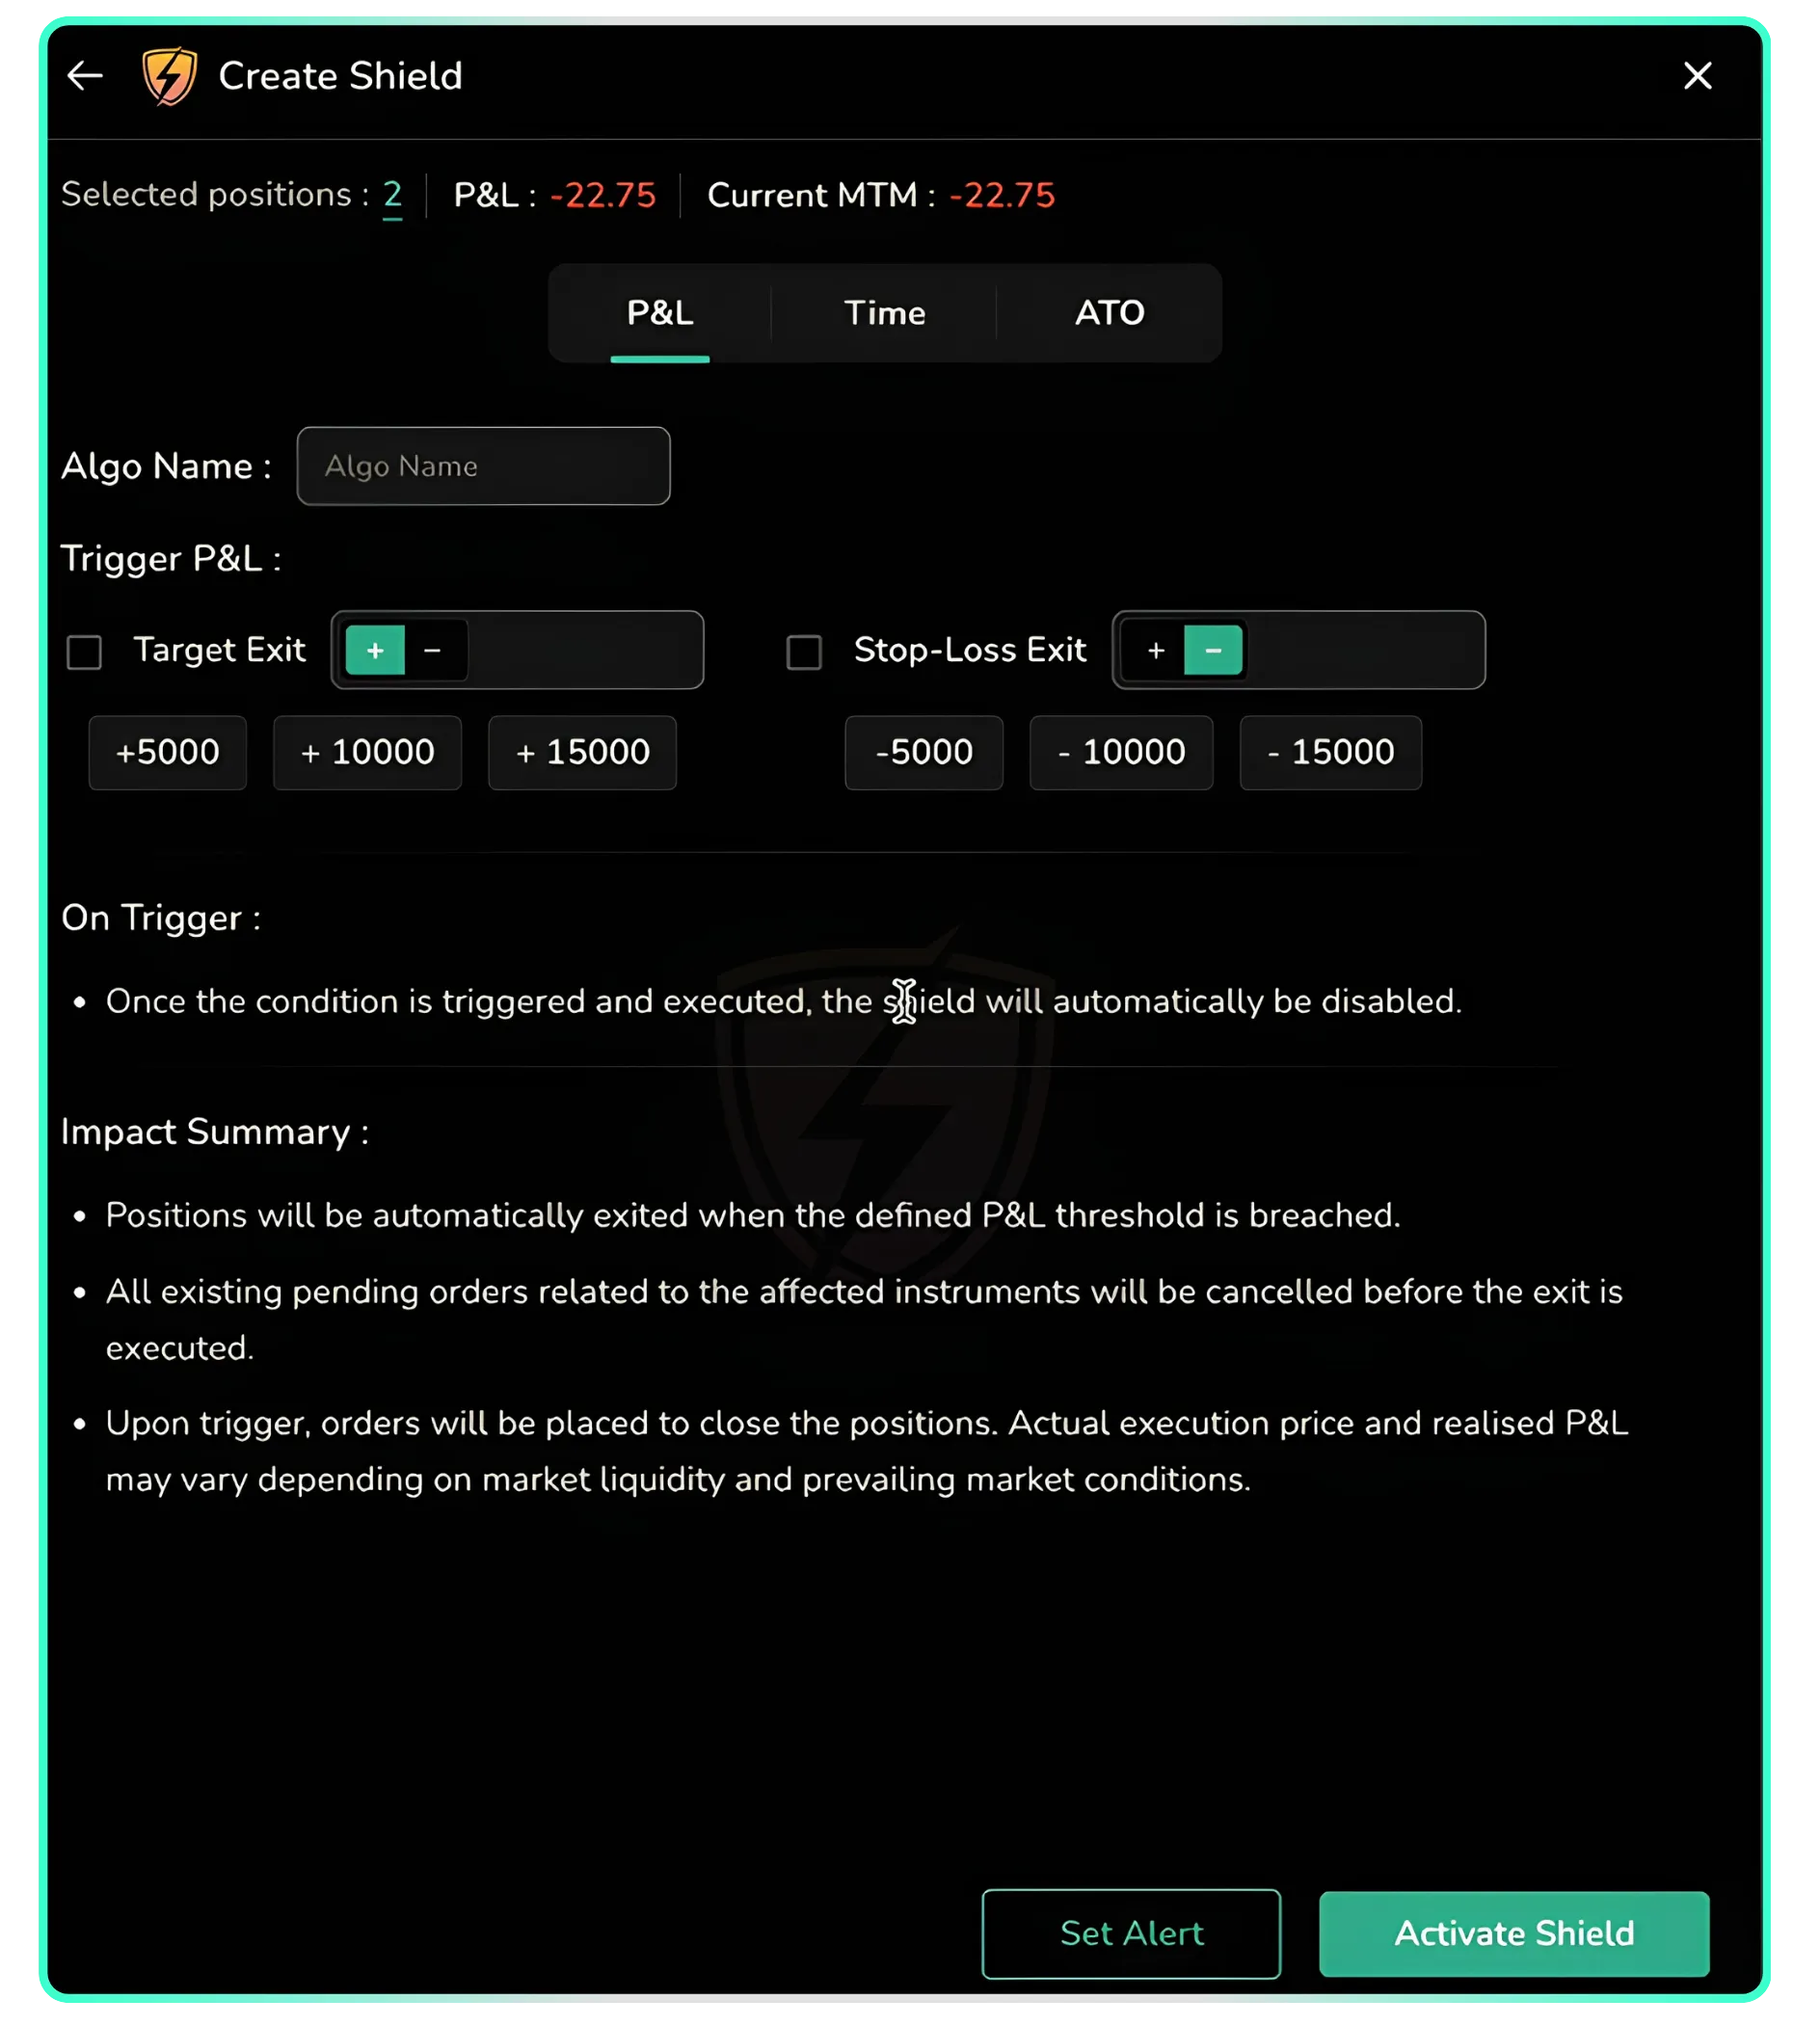
The Create Shield screen, with P&L, Time and ATO as the three exit types.
The P&L tab is the simplest of the three exit types. It lets you set two independent exit conditions—Target Exit and Stop-Loss Exit. You can enable either one or both, depending on your strategy. Enter a custom profit or loss amount, or use the quick-select values of ₹5,000, ₹10,000, or ₹15,000 for the target, and -₹5,000, -₹10,000, or -₹15,000 for the stop-loss. These shortcuts automatically fill the amount field, saving you from typing it manually.
Before setting the exit values, you can review the selected positions by clicking the Selected Positions count, which expands to display the complete list for verification.
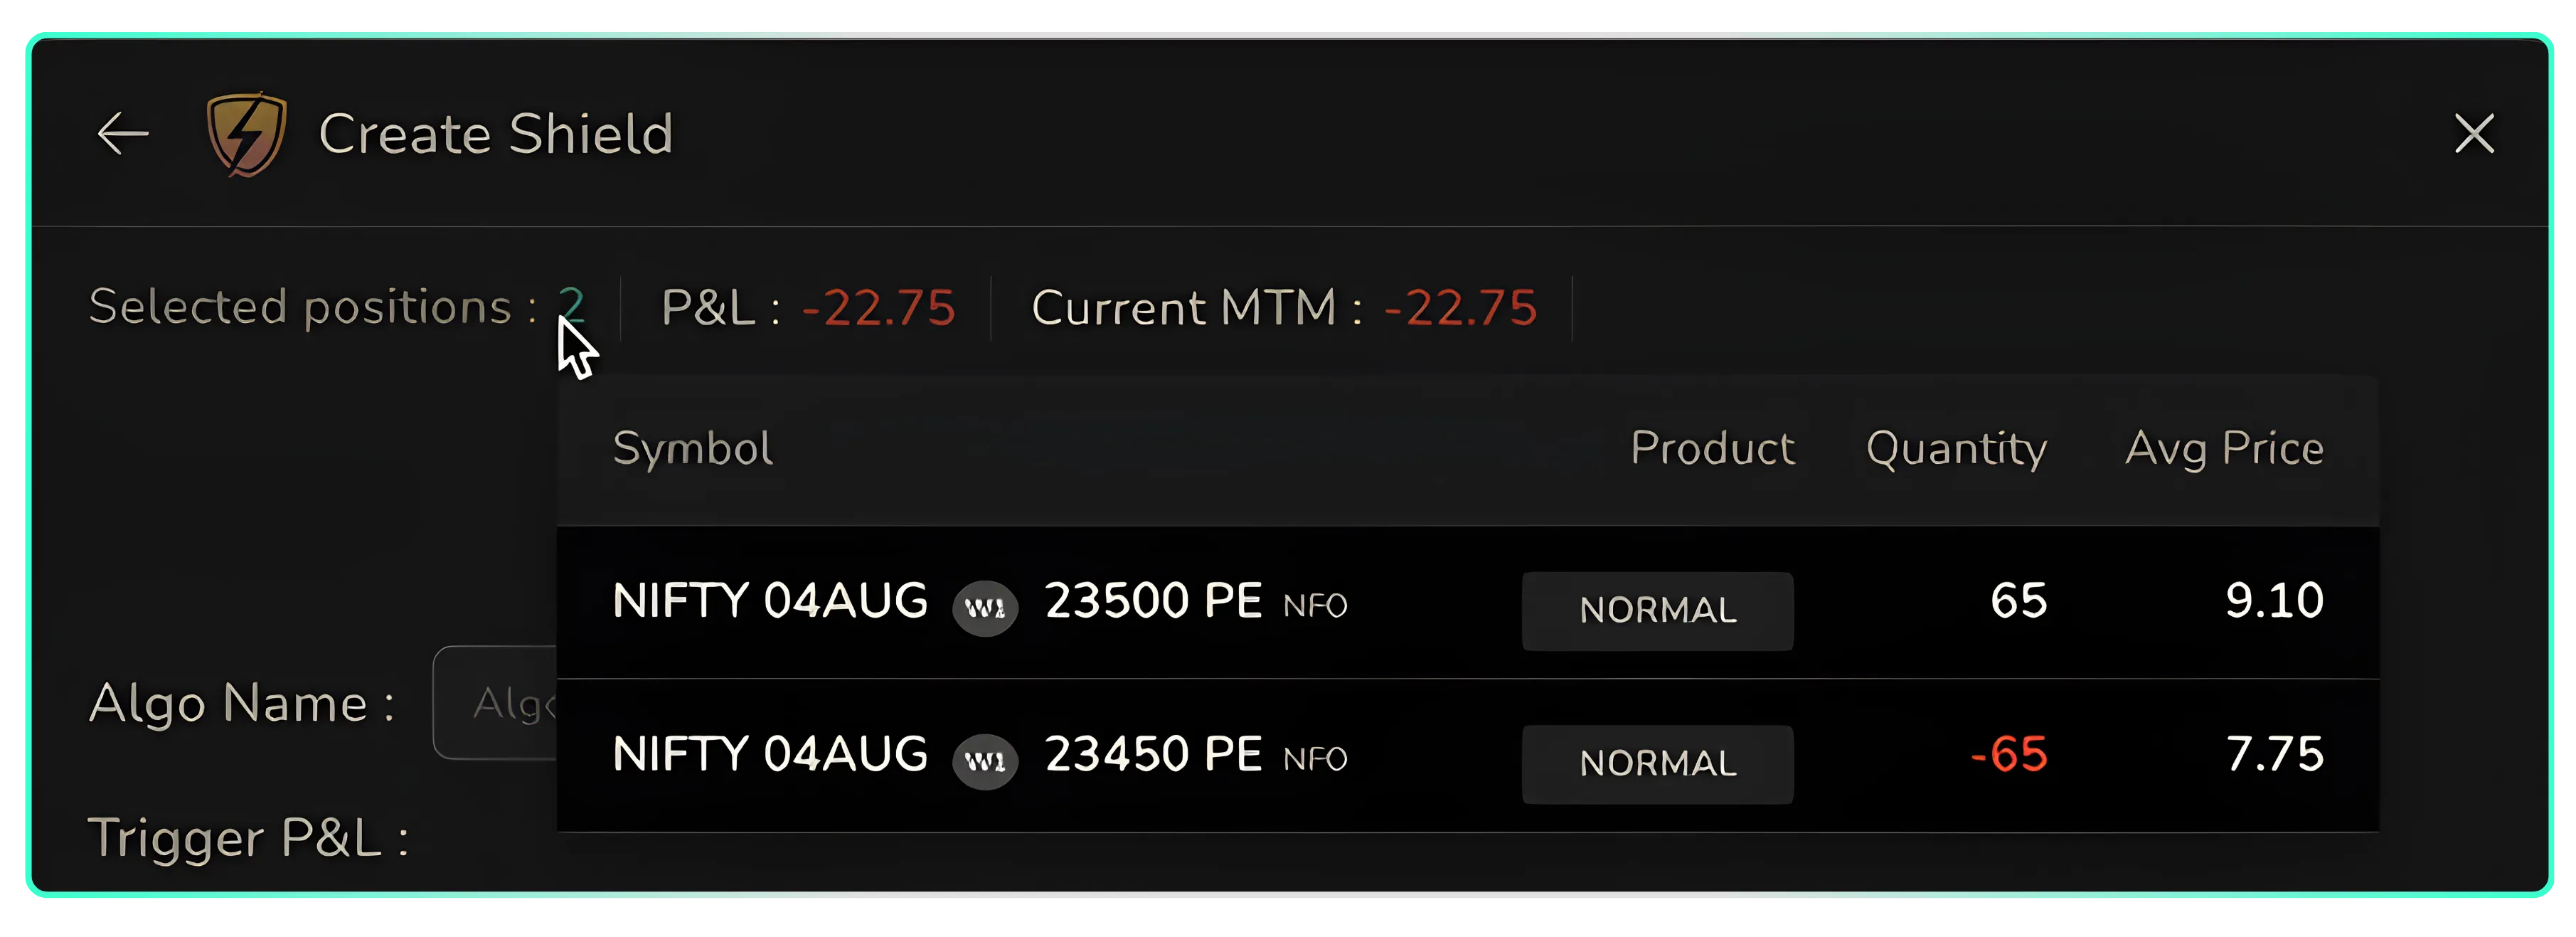
Selected positions expanded for a final check before the shield is built.
Giving your Shield a meaningful Algo Name makes it easier to identify later, especially when multipleShields are active. The Shield management screen, covered in Part 3, displays Shields by their Algo Name rather than by the positions they contain. In the example that follows, a Shield named Bull Call Exit is created with a Target Exit of ₹400 and a Stop-Loss Exit of -₹90 for two Nifty option positions.
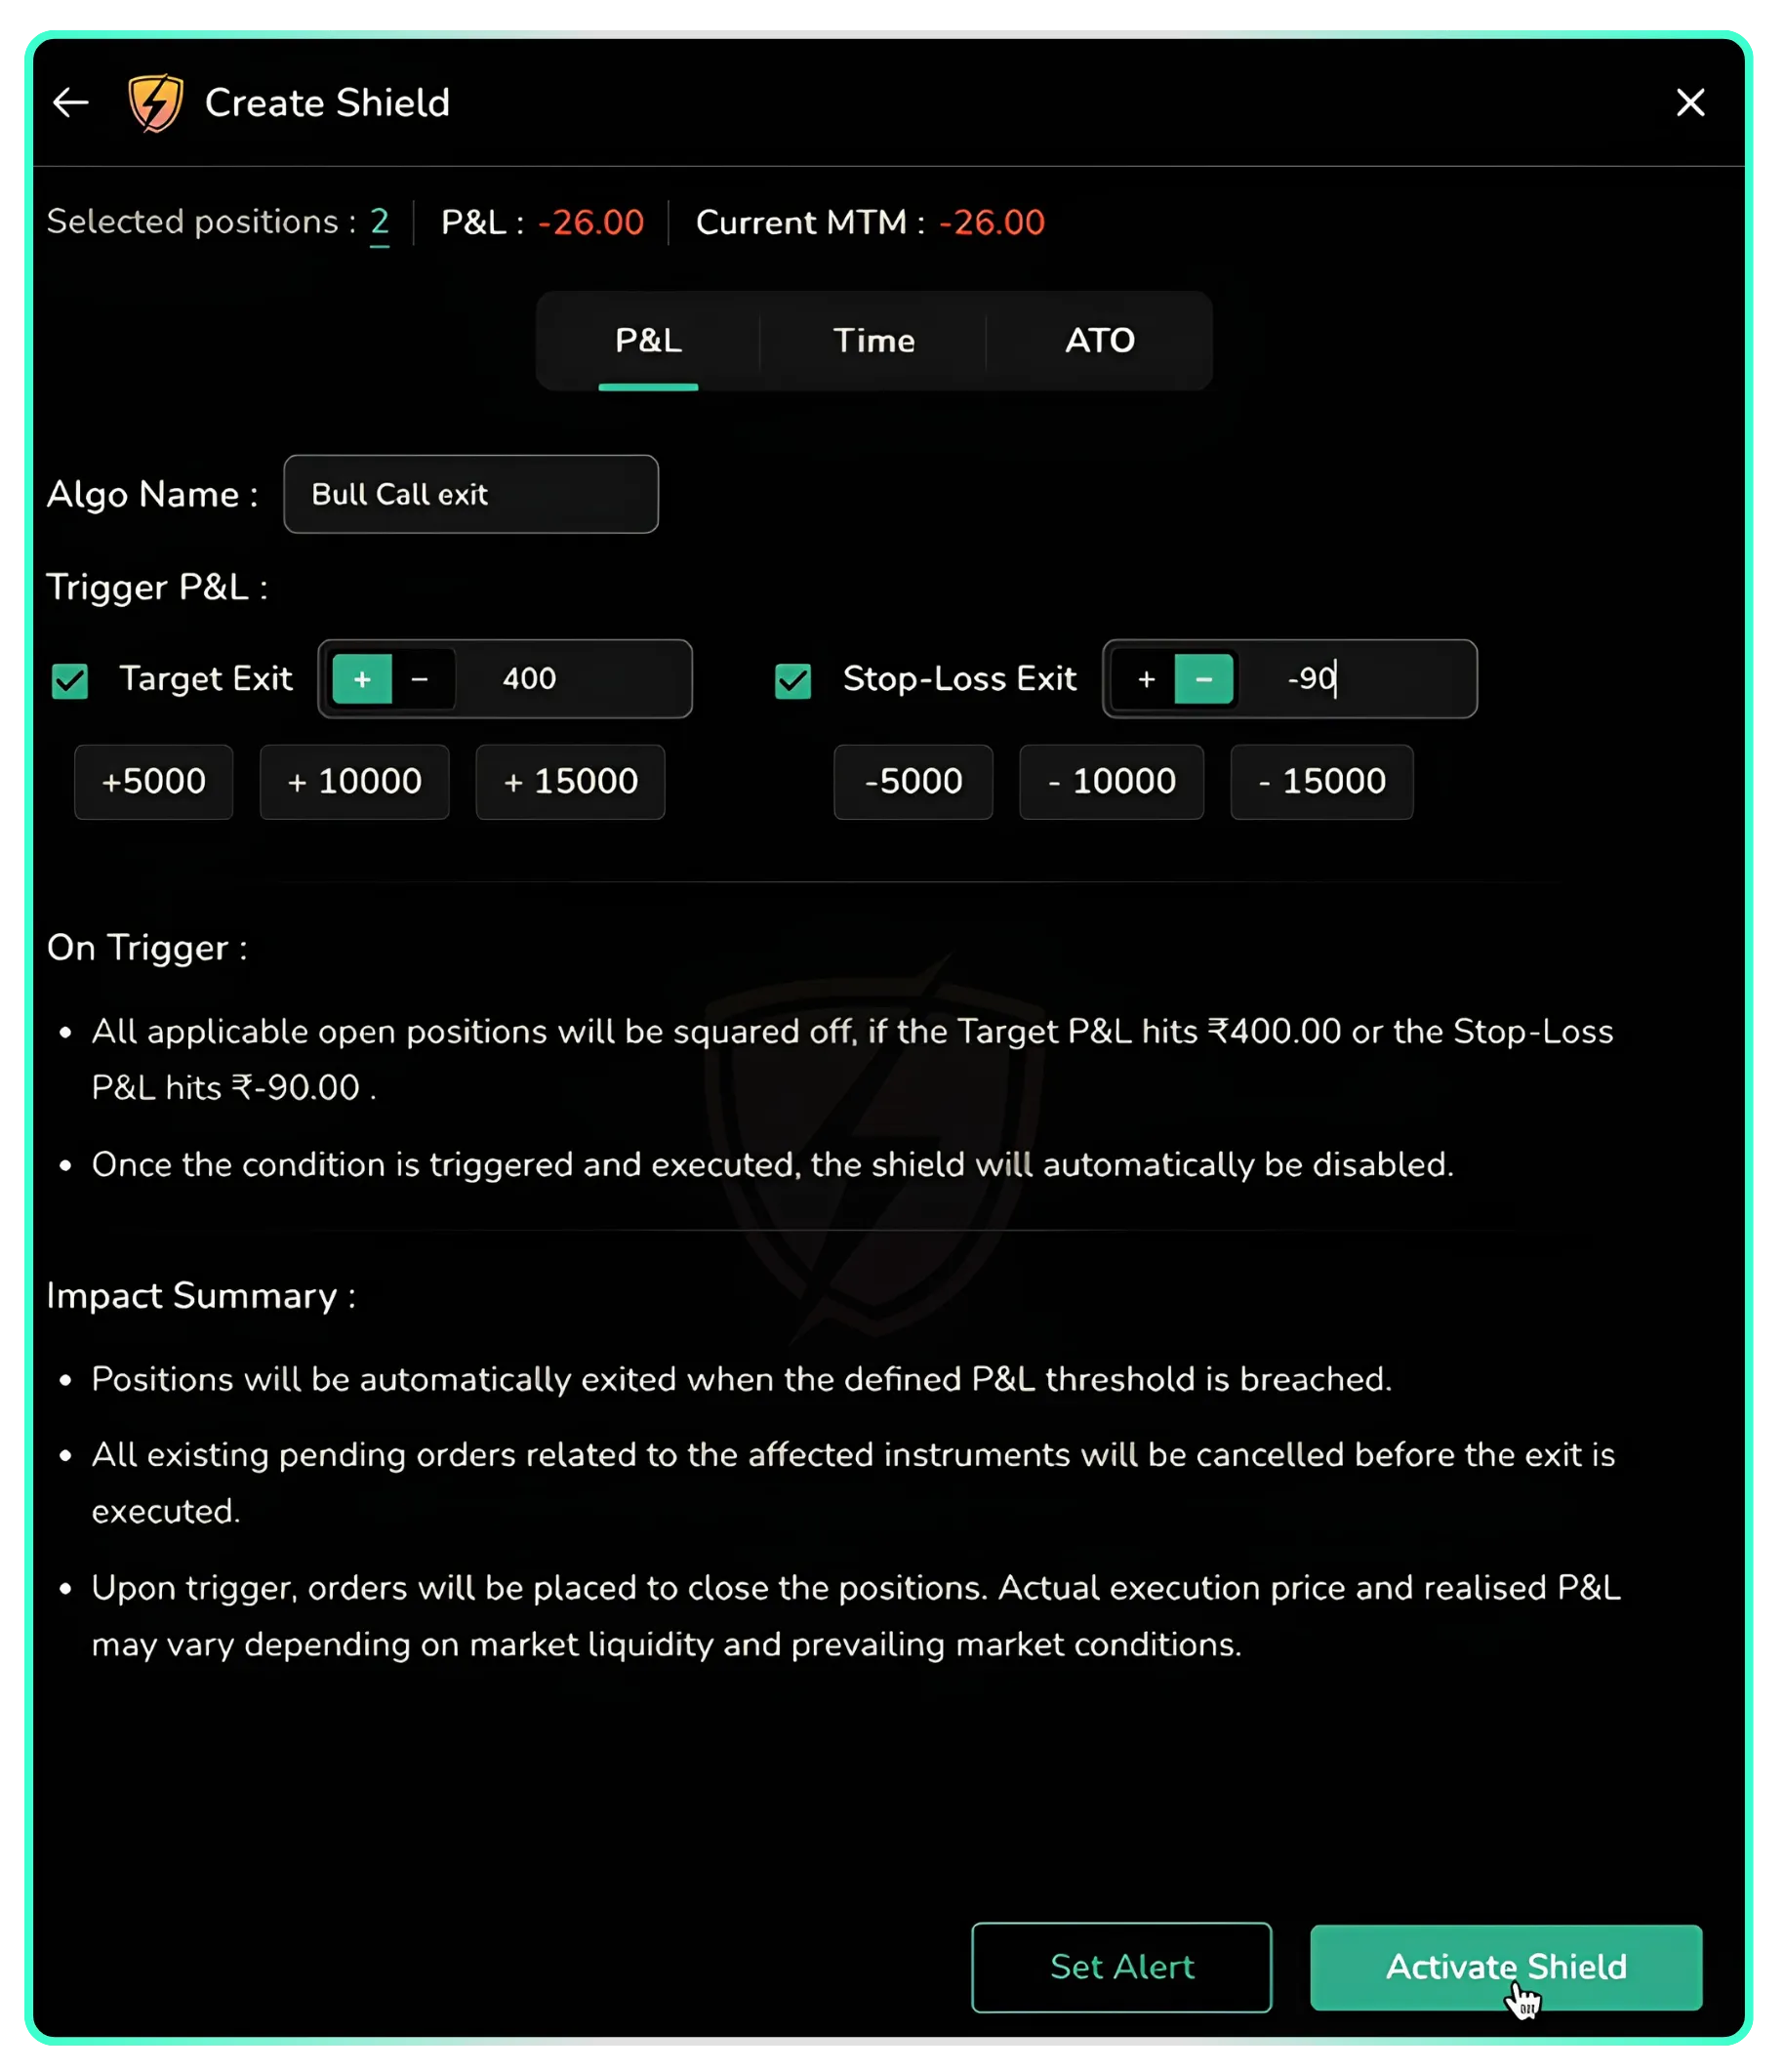
A P&L shield named Bull Call Exit, with a target of +400 and a stop-loss of -90.
Two Conditions apply to every Shield in CubePlus, regardless of the exit type, so it's worth understanding them here.
The On Trigger note confirms that once a Shield condition is met and the exit order is executed, the Shield automatically deactivates and does not monitor the position further**.** The final execution price and realised profit or loss depend on market liquidity and prevailing market conditions at that time.
At the bottom of the screen, you can choose between Set Alert and Activate Shield. Selecting Activate Shield displays a confirmation prompt before the rule goes live. Once confirmed, the Shield becomes active and starts monitoring the selected positions.
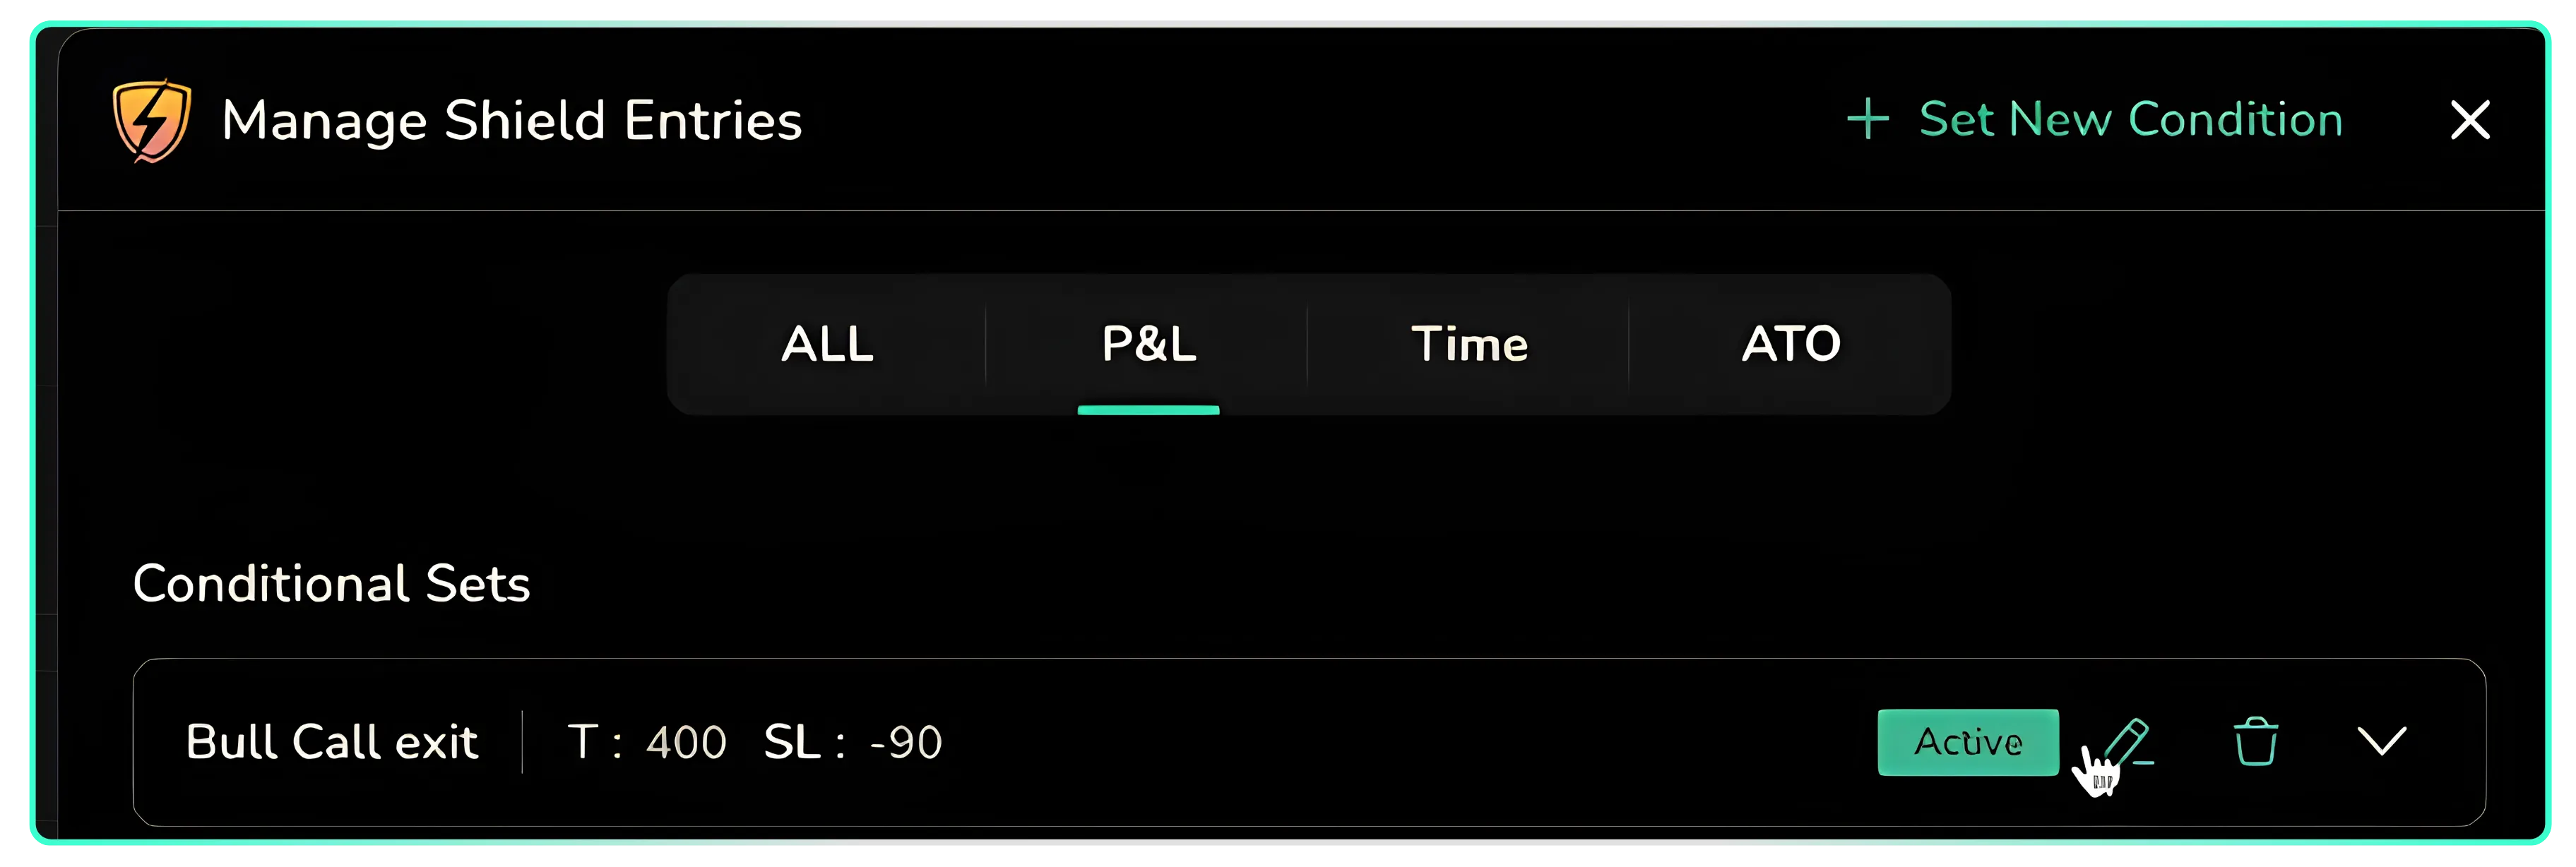
The shield now listed as Active under the Conditional Sets heading.
Once active, the shield appears on the Manage Shield Entries screen under a Conditional Sets heading, showing its name alongside the target and stop-loss values it was built with. From here it can be edited or removed, which Part 3 of this series covers in detail, along with the two remaining exit types, Time and ATO, taken up next in Part 2.
Watch the complete Shield walkthrough.


%252FCubePlus_Shield_Part%25203%2520Blog%2520Thumbnail.webp%3Falt%3Dmedia%26token%3Da5581624-5761-476f-8451-40c157b54840&w=3840&q=75)